Less admin. More automation. Straight into Xero.
Connect Dspatch to Xero and turn every completed job into an invoice, with the right customer, rates and details already filled in. No double entry. No lost dockets. Get paid faster.
Free to sign up · Free trial · Xero is a Pro plan feature
No double entry
Invoices in seconds
Get paid faster
Safe & secure connection
Why connect Xero
From the truck
to your books.
Stop re-typing jobs into your accounting software. Dspatch does the invoicing groundwork for you.
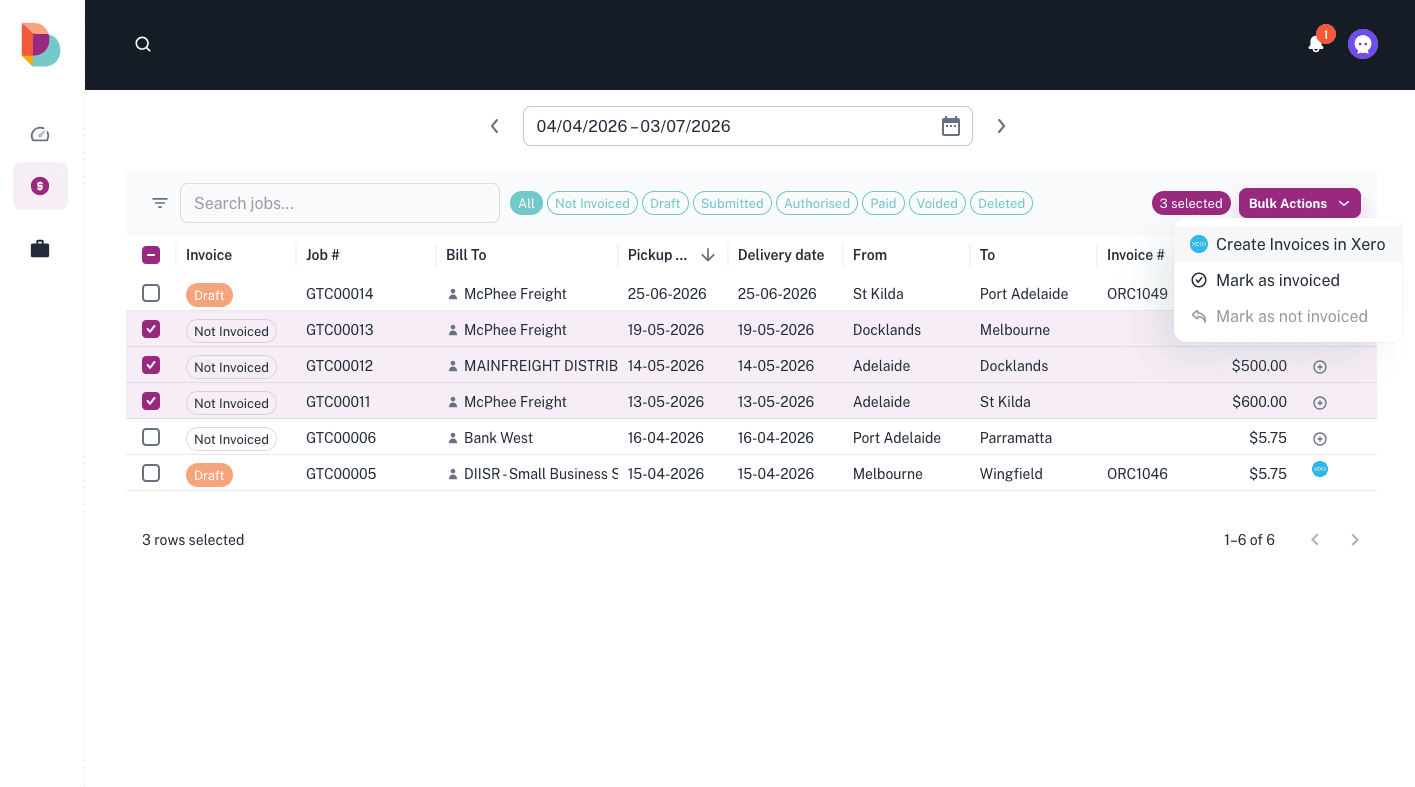
One job or a whole run
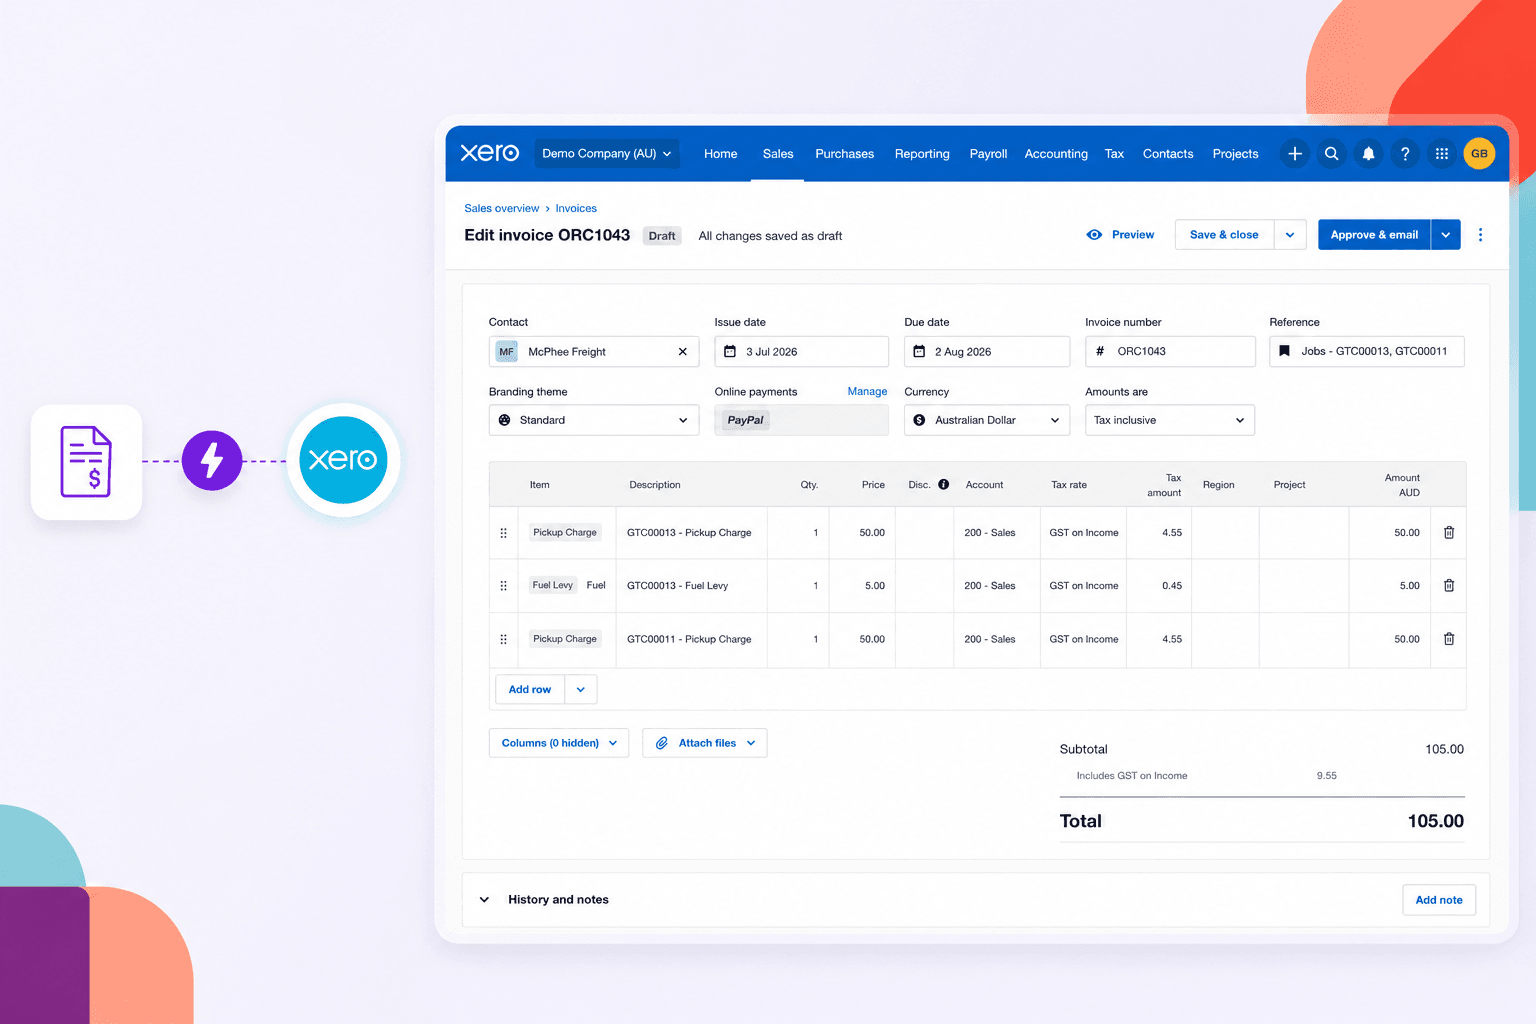
When a job is finished in Dspatch, push it to Xero as an invoice, complete with the customer, your rate card pricing, references and job details. Or select a batch and bill them at once: jobs for the same customer combine into one invoice. Review, approve and send from Xero. Nothing is typed twice.
Customers stay in sync
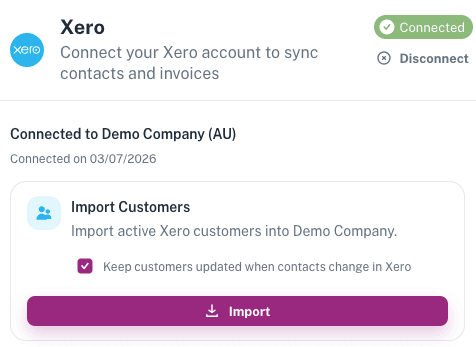
Match your Dspatch customers to your Xero contacts so every invoice lands against the right account. New customers can be created in Xero on the fly.
Right accounts & GST
Set your Xero account codes and tax rates once, and every invoice is coded the way your accountant expects, GST included.
Invoice the same day
Bill jobs the moment the POD lands instead of at the end of the month. Less admin, better cash flow, fewer forgotten jobs.
Safe & in your control
Dspatch connects to Xero securely. You approve the connection yourself, and you can disconnect any time from your Xero settings.
What data flows
Exactly what moves between
Dspatch and Xero.
Dspatch → Xero
- Invoices from completed jobs
- Line items priced from your rate cards
- Job references & connote numbers
- New customer contacts (when needed)
Xero → Dspatch
- Your Xero contacts, to match customers
- Account codes for invoice lines
- Tax rates (GST) for correct totals
- Invoice status back to Dspatch
Confirm the exact fields against your integration before launch, as Xero requires the listing to accurately describe data in and out.
Live in Xero in
under two minutes.
Open Dspatch settings
Head to Integrations in your Dspatch account and choose Xero.
Authorise with Xero
Log in to Xero and approve the connection. We never see your Xero password.
Match your settings
Pick your default account code and tax rate. Set once, done.
Send your first invoice
Finish a job, push it to Xero, and it's an invoice ready to send.
Xero integration FAQ
Do I need a paid Xero plan?
Yes. You'll need an active Xero subscription and a Dspatch plan that includes the Xero integration (available on Owner Operator Pro). You connect the two from your Dspatch settings.
Will it change my invoices without me seeing them?
No. Dspatch prepares the invoice in Xero for you to review. You edit it if needed, then approve or send it yourself, so you stay in control of what goes out to customers.
How does it handle GST and account codes?
You choose a default account code and tax rate when you set up the connection, pulled straight from your Xero organisation, so invoice lines are coded correctly with GST applied.
Is my data secure?
Dspatch connects to Xero securely. You approve access from within Xero and can turn it off at any time in your Xero settings. We never see your Xero password.
Can I disconnect later?
Absolutely. Disconnect from your Dspatch integration settings or from Xero at any time. Invoices already in Xero stay exactly where they are.
Connote to invoice, sorted.
Start free, connect Xero when you're ready, and stop typing every job in twice.
Start your free account